What do you do if you have to make a recording while away from your pristine home studio, your condenser mic, your recording device, and your perfectly setup DAW?
I was recently faced with this dilemma. Here is what I did. But first, here is why it happened.
Audition Approved, Manuscript Delayed
First I should briefly explain how I got into this situation. Obviously it would be better to avoid it completely, right? I mean, plan your work, work your plan, and get things finished prior to a vacation.
Sometimes life is more complicated than that. Way back on 30 June 2022, I accepted an offer on ACX to produce an Audiobook. Shortly thereafter, the Rights Holder (RH hereafter) contacted me to say they were in the process of updating the manuscript to reflect recent changes in the law. They said it wouldn’t be more than a week or two delay before they could send me the updated script.
No problem, I thought. While completing other VO projects, I patiently waited.
And waited.
And waited some more.
By the time end of July rolled around, I was planning a multi-week road trip throughout August which would take me over 3500km away from my home studio. In the back of my mind I thought, “Murphy’s Law says the RH will have the manuscript ready to go while I am away, when I won’t be able to record.”
Sure enough, on 10 August, the RH messaged me on ACX saying the manuscript has been uploaded and my work could commence. Since I was mostly offline (vacation, anyone?) I didn’t see the messages right away. By 13 August, the RH sent another ACX message asking me what was going on.
Honesty Is the Best Policy
I apologetically replied the RH and advised them I was travelling and that it would be at least two (or more) weeks before I could start work on their audiobook. I said that if they wanted to reassign the contract to another producer I understand, no hard feelings. The RH said they would prefer to leave the contract with me and they were happy to wait for me to get back into the studio.
I Didn’t Want to Wait
I wanted to knock this off my To-Do list, and I wanted to get paid ASAP. Vacation travelling to meet friends and family is great, but I really like recording. I missed working. So I setup for a high-quality, remote, on-the-road, away-from-home audiobook recording. Here is how I did it, and how it turned out.
Step One: Recording Environment
First things first: I had to create a sonically acceptable recording booth at a friend’s house. Recording environment is the most important thing, more than microphone or interface or DAW. See my blog post about the importance of your recording space.
But how could I create a pristine recording environment away from home? A walk-in closet is often recommended as a good “starter VO booth”, but the friend I was staying with did not have a walk-in closet in his tiny 1950s bungalow.
Aside: I briefly considered renting recording space at a professional recoding location, but the cost was prohibitive.
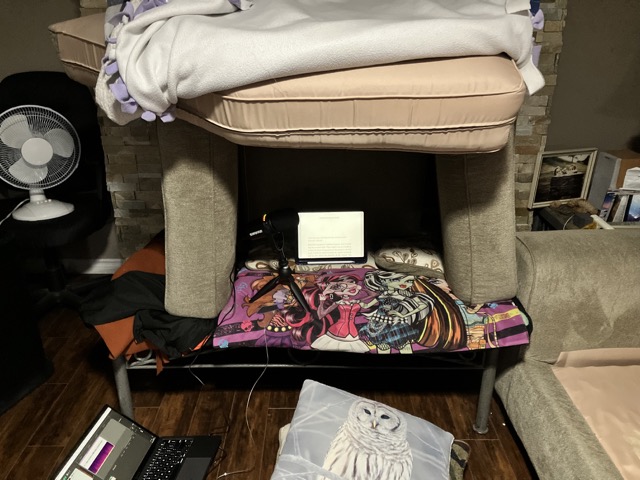
The goal is to create an environment which eliminates the reverberation and slap-back echos that are always present in an untreated room. To stop the echoes and reverb, I built a “couch cushion fort” into which I could setup my microphone and and lean myself in. Using the cushions from my friend’s couch, three cushions formed the left, right, and back “walls” of the fort. A fourth cushion was placed on top. These cushions were assembled on the coffee table, with a few small throw cushions on the floor for me to sit on. A heavy blanket was draped over the top cushion, which I pulled down behind myself when I was seated on the floor and in recording position, sealing myself in and surrounding me with sound reflection stopping material. My iPad (displaying the manuscript PDF) sat in front of me inside the fort, and the mic (more on this in a minute) sat slightly off to the side, to avoid plosives, just a couple of inches from my mouth. This simple setup worked very well, and eliminated the echo and reverb room sounds.
There are some downsides to this setup: it quickly gets hot under that blanket, and it is not a very comfortable position to be in for extended periods of time. Good thing this was a temporary solution!
Step 2: Background Noise Level
Now that I had my ersatz recording booth, the next thing to check was background noise level. The cushion fort is for sound treatment, not external sound abatement. Eliminating any offensive external sounds would have to be handled by me at their source.
This setup was in my friend’s basement, which is usually a good starting location, since you are partially buried in the ground which prevents street noise from entering the space.
Since I was on a quiet cul-de-sac, traffic noise would not be an issue, even though there were small basement windows, facing the street, just two meters away from the cushion fort. So far, so good.
At the far end of the room was a mini-fridge for soft drinks. My initial test recordings did not pickup the fridge compressor sound, but I didn’t take any chances: while I was recording I unplugged the fridge. (Pro Tip: make test recordings before you commit to reading for hours!!!)
The other potentially problematic background sound was the central air conditioning. The HVAC blower was in the basement, just one room over; a heavy cinderblock wall separated my makeshift recording space from the utility room. Remember: for sound abatement, mass is your friend. A heavy brick wall will be more effective than a light stud-and-drywall partition. Thanks to that heavy wall, I could not hear the HVAC blower motor directly, but my mic was picking up the sound of the air blowing out the vent directly over my head.
The solution was simple, but uncomfortable: turn off the AC while recording.
Step Three: Microphone
I did not anticipate having to record while travelling, so I did not have a good mic with me. I even forgot to bring my lavalier mic, since I wasn’t planning on making any videos. Even if I had planned to record, carrying my delicate Rode NT-1A mic would just be nerve-wracking. I wouldn’t ever want to travel with that delicate flower.
Since I am the type of person that likes to solve problems completely the first time, I decided I needed a travel mic (or more correctly, a complete portable recording setup with microphone, interface, DAW, etc.). With a portable travel setup I will always be able to respond to future client requests, even when away from my studio. This should be part of my professional equipment.
But which mic should I purchase? Obviously I wanted one that “sounds good with my voice”. That’s a given. What else?
- rugged, to take the rigours of travel without damage (presumably a dynamic, not condenser type)
- knowing that my recording environment might not be perfect, a less sensitive mic would be better; less sensitive would mean less likely to pickup unwanted room noise, external noise, etc. (again, a dynamic mic is indicated)
- USB or XLR? (depends on whether recording directly into laptop via USB, or into an interface like Zoom U-22 or Zoom H6 recorder which accepts XLR)
Based on the first two criterion, a dynamic mic was clearly indicated. But the USB vs. XLR question was a bit more tricky. I’ve found my fellow recording nerds and booth junkies generally dismiss USB microphones as being inferior to traditional XLR mics, and I believe this is often true (don’t get me started on the low quality of the very popular Yeti mics). After doing a bit of homework I found that there are actually some very good quality USB mics (either dynamic or condenser style) now available.
Deciding which mic to buy, and which interface to select (USB vs XLR) sent me into a rabbit hole of watching YouTube reviews for the better part of a day.
Obviously, if I chose an XLR mic, then I’d have to also purchase an XLR-to-USB interface, since I didn’t bring my Zoom H6 on this trip. More importantly, going with XLR would mean my travel gear setup would have to include that interface, and the associated cables. I prefer to “travel light” and “keep it simple”, so was leaning toward a mic which has USB output directly.
After much “research” and hand-wringing (OK, let’s be honest, research is too strong a word; I didn’t get any NSERC grants, didn’t perform statistical analysis comparing test groupx against a control group), I purchased the Shure MV7.
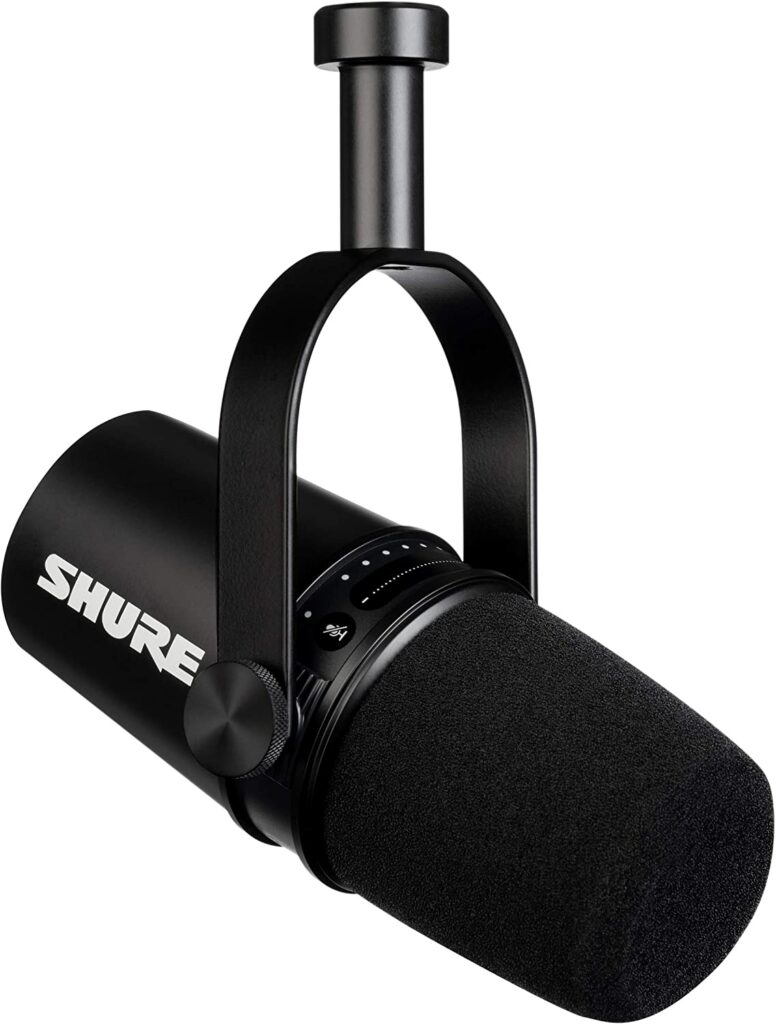
It is has both a standard XLR interface (so it can be used in my home studio with my Zoom U-22 interface, my Zoom H6 recorder, or any other XLR-to-USB interface), and also a USB interface (so it can directly connect to a laptop, iPad, or iPhone, without the added expense and complexity of an intermediate USB interface. Put another way: the XLR-to-USB interface is built into this mic. It is a rugged dynamic mic and according to some reviewers, had a sound quality similar to its big brother, the popular and legendary Shure SM7B. It checked all the boxes: dynamic mic (not condenser mic); USB output (with XLR a bonus I wasn’t expecting but might need one day); overall excellent sound quality.
To mount it in my ersatz booth, I purchased a 3/8″ to 1/4″-20 adapter, which let me mount it to the mini camera tripods I had with me on this trip. So I didn’t have to buy a mic stand for it.
Step Four: Recording Platform
At my home studio, I record onto a Zoom H6. That is, my Rode NT-1A is directly connected to one of the XLR inputs on the Zoom H6, and the H6 provides the phantom power the condenser NT-A1 requires. This keeps the booth simple and foolproof: power up the Zoom H6, press the big beefy RECORD button, and… BOOM… I’m recording. No laptop to keep updated with OS patches and DAW software patches; no crashes to deal with, etc. When I’m finished a recording session, I just pop out the SD card and take it to my production DAW to import and edit the files. My process works flawlessly for me, every time.
I can’t (easily) do “punch and roll” recording with this setup, but I don’t want to. Let me explain why.
I am both the performer and the recording engineer. Doing a “punch-in” takes my mind out of performance mode, and into recording engineer mode. There is a cost associated with this type of context switching, and I want to stay in performance mode in the booth. Like I said: I press record on the Zoom H6 and it’s showtime, every time, without fail, without delay.
When I flub a line, I mark it with a dog trainer clicker which puts a big obvious spike on the waveform and is super easy to see in the DAW, making it simple to find and chop out the error.

Fans of “punch and roll” say that it saves them time, but I’ll bet it doesn’t save much, if any, compared to “click/mark and continue”. With punch and roll, you still have to pause your recording, move the recording head back to the desired location, listen to the playback cue, get your eyes onto the correct portion of the script, and get your performance voice ready to seamlessly pick up at the right spot. And hit the record button at precisely the correct time.
I’ve done punch-and-roll with a sound engineer, and in that context it works well. For my solo recording process, not so much. [For more info about why to not use punch and roll, see this blog post by Lance Blair.]
So, my SOP recording process uses an XLR condenser mic directly connected to a high quality dedicated recorder, the Zoom H6. But like I said, I didn’t bring my Zoom H6 on this trip. Luckily, I had two other devices with me that could be used to record, assuming I can work out the interface: my iPad Air and my MacBook Air.
I chose to use my iPad exclusively for script presentation (which is my usual process) and connected the Shure MV7 directly to the MacBook Air, using the USB output from the mic. The MacBook was running my preferred DAW, Reaper, configured and optimized just the way I like it, for narration editing. Fortunately I recently mirrored my customized Reaper setup, from my Windows production PC, to my MacBook, so I was ready to get to work in a familiar environment. The only difference was I would be both recording and editing in Reaper, rather than simply importing files and before editing.
Oh, and since I didn’t have my clicker, I snapped my fingers to mark errors. Not as easy to see on the waveform as the clicker, but better than nothing.
An Investment In My Future
The Shure MV7 cost me about as much as I’m going to make from the audiobook that necessitated its purchase. So why did I even bother?
I view this as an investment in my future. Consider this: I purchased all my studio equipment, and built my sonically clean recording booth, long before I made any money in VO. That investment is paying off. As a professional, having the ability to record while travelling will add an extra dimension to my value proposition. It will pay dividends in the long run. Furthermore, having a robust, high quality travel mic opens up the possibility for new projects, outside the studio.
Finished Product: Sample
Here is a snippet from the final production, all recorded in a couch cushion ersatz booth, in a friend’s basement, while on a road trip. What do you think? Can you tell I’m not in my usual studio location? I think I can tell a very slight tonal difference, mostly (perhaps entirely?) due to the use of a different microphone. Slight tonality difference aside, all of the measurable metrics meet or exceed ACX requirements (sound floor, average level, peak level).
Working just an couple of hours per day, I completed the 3h 42m on the first day of September.